BMW F800
Installation Guide
This is a step by step guide to installing the HEX ezCAN on BMW F800 series bikes. The following F800 bikes are supported:
- F800GS Adventure - K75
- F800GT - K71
- F800S - K71
- F800ST - K71
- F800GS - K72
- F800R - K73
- F700GS - K70
- F650 (2008+ 2 cylinder) - K72
Locate your bike's battery, DWA connector and horn input
Find DWA under the seat, towards the rear of the bike.
Look in the rear compartment, under the seat, towards the tail of the bike.
Close-up of the DWA connector.
Battery is located under the top cover.
Look for the horn connector on the left side of the bike, behind the radiator.
Here we see the HEX ezCAN horn extention wire installed.
Finally, we connect the horn extension wire to the matching wire on the ezCAN.
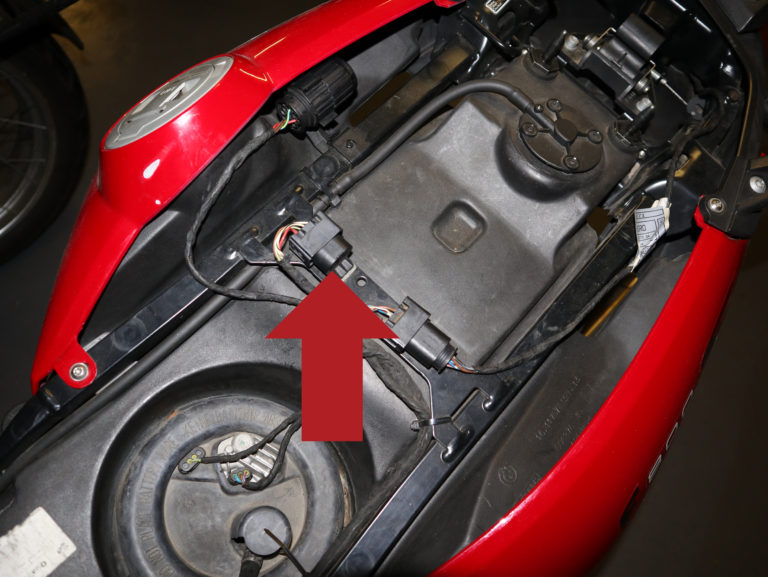
The F800S DWA connector is easy to find under the seat.
The horn is accessible if you reach down the left side of the fork.
Access the battery by removing the top body panel.
The DWA is located on the side of the fuel cap.
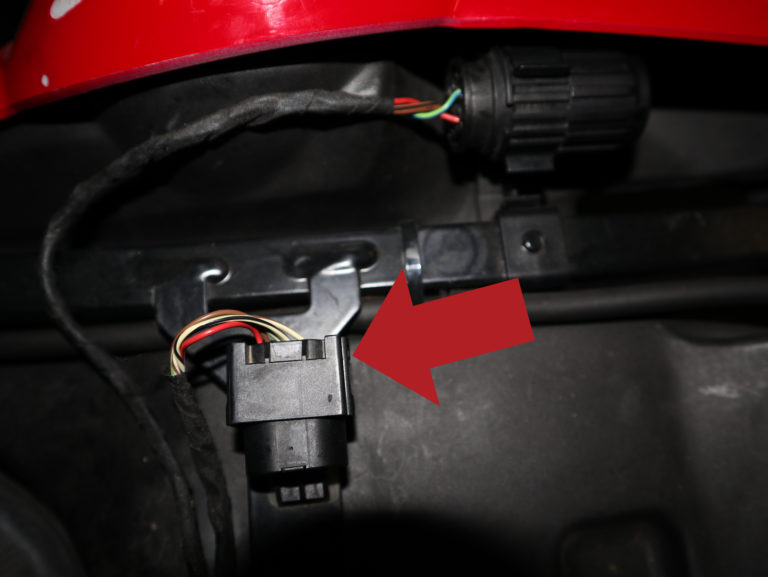
A close-up of the DWA connector with the diagnostic port in the background.
Remove this plug to install the ezCAN horn extension wire.
Here we see the ezCAN configured with the horn.
Finally, connect the horn extension wire to the matching wire on the ezCAN.
Install and configure the software
Download and install the HEX ezCAN configuration software from the Software page.
Our Software page sets out the process of configuring the installation with the HEX ezCAN configuration software.
Connect your ezCAN to the computer and make sure your unit has the latest firmware.
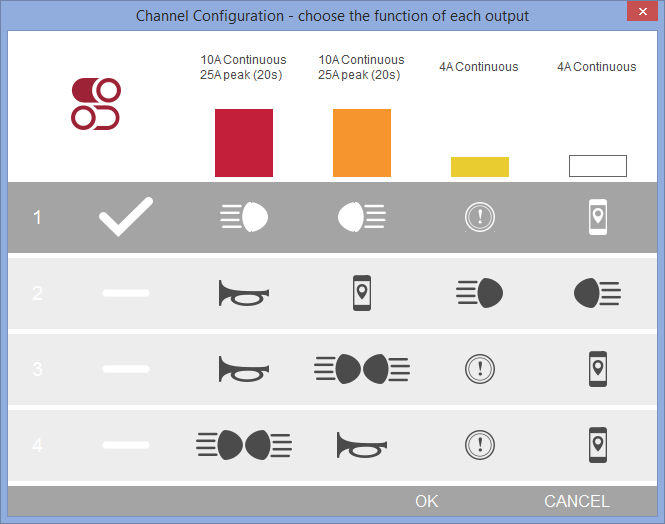
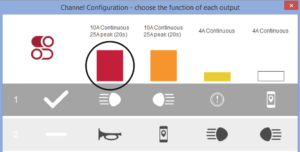
Determine the channel configuration, see below.
Install the ezCAN under the seat
You can secure the ezCAN with the velcro strips provided after the accessories have been plugged in.
Route and connect the battery wires
The battery is located under the centre trim panel. Remove the seat and the centre trim panel by removing the six or eight screws. Route both the ezCAN power supply and ground cables along the motorcycle’s rear sub-frame and over the rear side of the engine airbox, to the battery. Disconnect the battery wiring harness terminals from the battery and connect the ezCAN wires to the battery before re-connecting the factory wires.
IMPORTANT NOTE: First, unplug the battery negative wire and only attach it at the end again. This is good practice whenever you work on your bike's electronics.
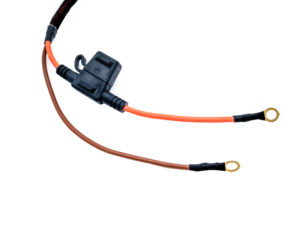
HEX ezCAN Power supply cables
Plug the ezCAN into CAN-Bus
Note: DWA is the German abbreviation for ‘Diebstahl Warnanlage’ (anti-theft alarm system)
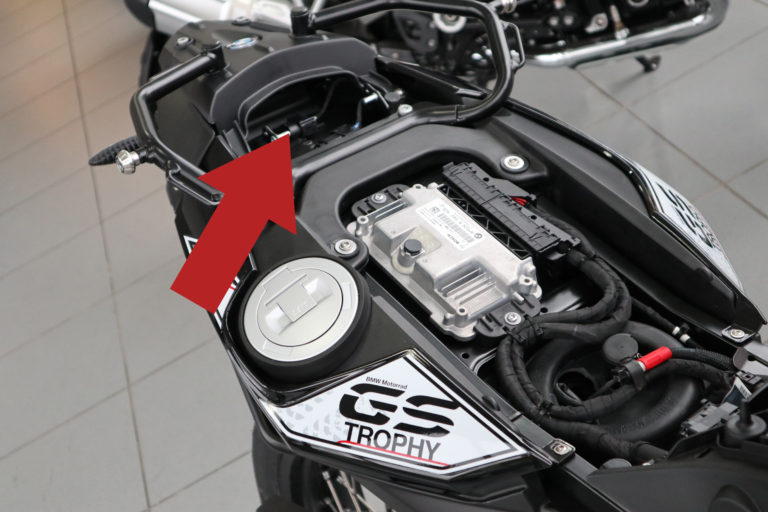
Bike with DWA control unit (Alarm)
- If your bike has a DWA, that is, ‘anti-theft alarm system’, you will see the DWA module in the small compartment under the rear half of the seat, in front of the taillight. Note the wiring harness plug connected to the module.
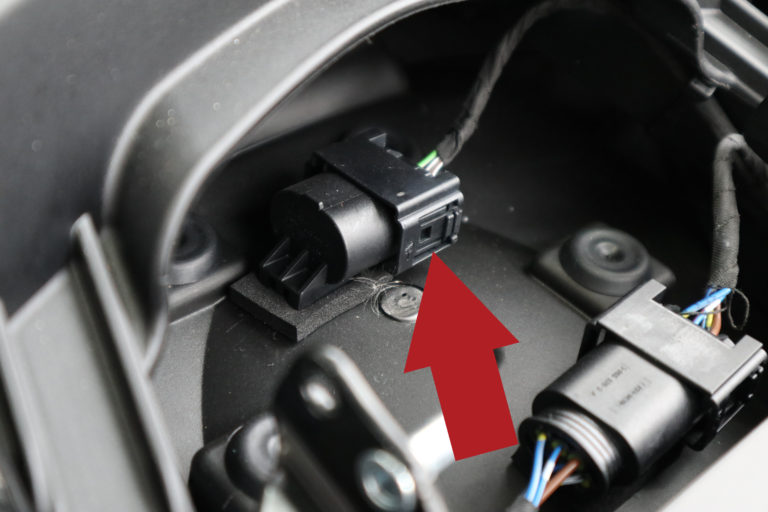
- Start by unplugging the CAN-Bus connector from the DWA control unit.
- The HEX ezCAN has two CAN-Bus connectors. Plug the male HEX ezCAN terminal into the CAN-Bus wiring harness and plug the female HEX ezCAN terminal into the DWA Control unit.
Bike without DWA control unit (Alarm)
If your F800 does not have a DWA system, the end of the wiring harness plug will be covered by a plastic blanking plug containing an alarm-terminating resistor.
- Start by unplugging the cap from the DWA connector plug
- Plug the male HEX ezCAN terminal into the CAN-Bus connector.
- Replace the cap on the female HEX ezCAN terminal.
That's how easy it is!
IMPORTANT NOTE: Both the male and female ezCAN CAN-Bus terminals must be connected correctly. Do not connect to any other component or to any other part of the motorcycle's wiring harness. If you do, the ezCAN will not function.
Connect the green horn input connector (Horn trigger wire)
Note: If you do not instal the green horn input wire your high power accessory horn and Front auxiliary lights - strobe when horn active function will not work.
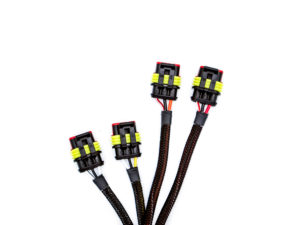
If you are going to install an accessory horn, connect the accessory horn to the chosen high-power output stub connector on the ezCAN.
In order for the horn to work also connect the green horn trigger wire.
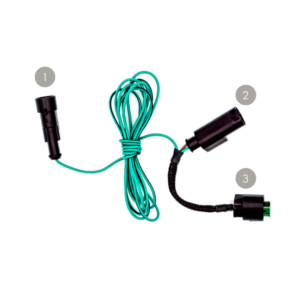
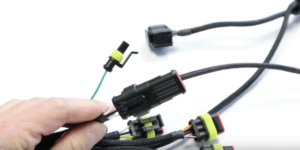
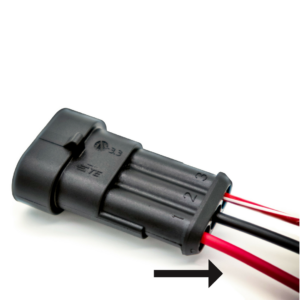
The HEX ezCAN kit contains a green wiring harness with one terminal pin, branching out to two sets of two terminal pins.
1. One terminal pin 2. Male two-pin plug 3. Female two-pin plug
Connect the end of the green wire with one terminal pin to the one-pin terminal on the ezCAN.
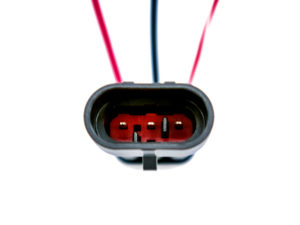
Find the standard BMW horn on your F-series motorcycle. Disconnect the motorcycle’s horn connection from the standard horn. Connect the male two-pin plug of the green wire to the horn connection on the BMW wiring harness.
Connect the female two-pin plug of the green wire to the standard BMW horn.
Connect accessories using colour-coding
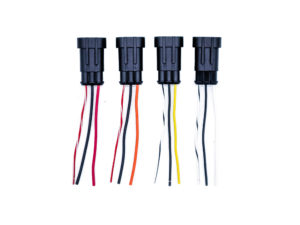
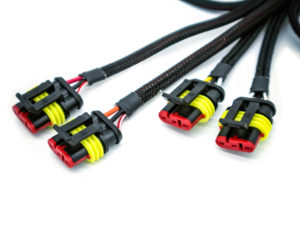
The HEX ezCAN kit includes eight stub connectors with male connection terminals. Four of the stub connectors have three wires while the remaining four connectors have two wires.
Three Wire stub connector
Three wire stub connectors
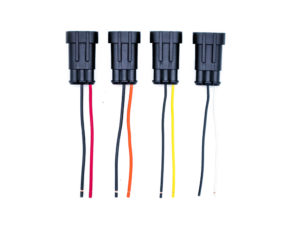
If your auxiliary lights have three wires use the three wire stub connectors. If not the two-wire stub connectors must be used for accessories that have power and ground wires only.
If you are not going to use one or more of the power output channels, it is recommended that you install a blanking plug over the unused output. The HEX ezCAN product contains two blanking plugs.
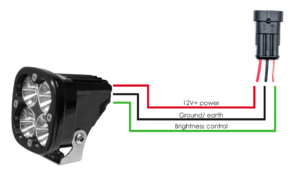
The colour-coding on the output wires must match the colours in the output configuration you select from the HEX ezCAN channel mapping software. Red to red, orange to orange, etc. (Black wire is Battery Negative and the Red, Orange,Yellow and White are the Positive Supply.)
Connect the terminals of the high-power and low-power stub connectors to the correct female terminals on the ezCAN.
Connect the spotlight’s ground wire to the ground wire of the stub connector.
If you are installing spotlights equipped with a third wire for light-intensity control, connect the spotlight control wire to the control wire of the stub connector. If the spotlight only has two wires, use the two wire stub connectors.
Test the installation
Most newly installed accessories can be tested simply with the ignition "ON", but some brake functions will require the bike to be in motion and traveling above a certain speed. For example, emergency braking requires deceleration of more than 21km/h/s (kilometres per hour per second).
SAFETY NOTICE: Test and check your installations and accessories in a safe, controlled environment. Caution is advised at all times. Extra vigilance is required when testing new features or accessories. You do so at your own risk.
DISCLAIMER: HEX ezCAN is not liable for any injury or damage howsoever caused and all products and services are used at your own risk.